You went to update a plugin — or maybe WordPress updated itself automatically overnight — and now every page of your site shows the same message:
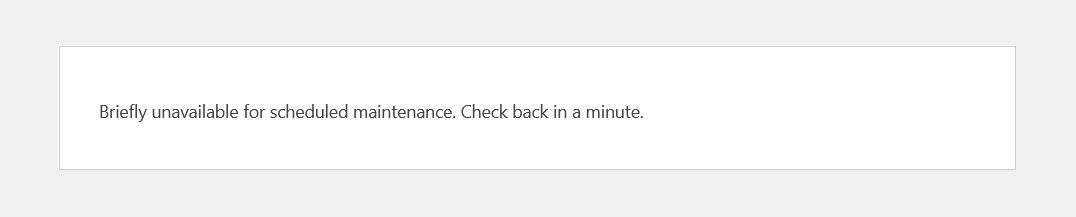
“Briefly unavailable for scheduled maintenance. Check back in a minute.”
It’s been more than a minute. Much more. And your visitors are seeing that message instead of your site.
This is one of the most common WordPress errors, and it’s also one of the most fixable. Unlike a database connection error or a white screen of death, the WordPress stuck in maintenance mode problem almost always comes down to one small hidden file that didn’t get cleaned up the way it should have. Deleting that file brings your site back online immediately.
This guide covers the fix, what to do if the fix doesn’t immediately work, how to re-run the interrupted update safely, and how to stop it from happening again.
Why WordPress Gets Stuck in Maintenance Mode
Understanding why this happens makes the fix obvious.
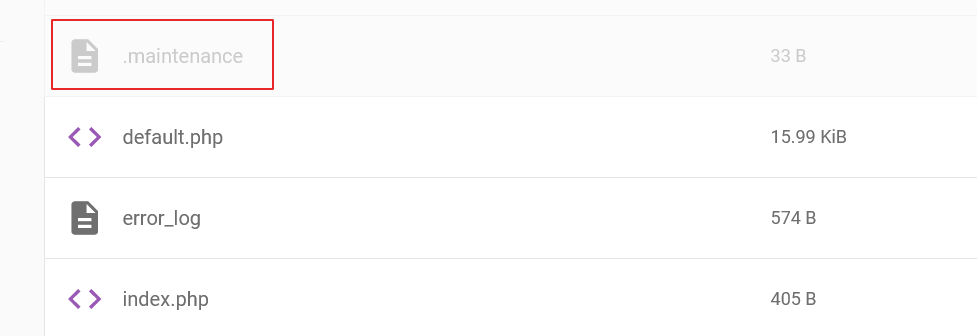
Every time WordPress runs an update — whether it’s a core update, a plugin update, or a theme update — it puts your site into a temporary maintenance mode to protect visitors from seeing a broken or half-updated site. To do this, WordPress creates a hidden file called .maintenance in your WordPress root directory.
While the update runs, this file sits there and tells WordPress to display the maintenance message to all visitors. When the update completes successfully, WordPress automatically deletes the .maintenance file and your site comes back online — all within a few seconds, usually without you ever noticing.
But if the update gets interrupted before it finishes — because of a network timeout, a server memory limit, a slow server response, a browser tab being closed mid-update, or a plugin conflict — WordPress doesn’t get the chance to delete the .maintenance file. The update stops. The file stays. And your site stays in maintenance mode indefinitely.
That’s it. That’s the entire problem. One file that wasn’t deleted.
Before You Start: Is This Maintenance Mode or Something Else?
The classic WordPress maintenance mode screen says exactly this:
“Briefly unavailable for scheduled maintenance. Check back in a minute.”
If you’re seeing that message — you’re in the right guide.
However, a few related scenarios can look similar but have different causes:
- You’re seeing a blank white screen instead of the maintenance message — this might be a White Screen of Death caused by the failed update rather than maintenance mode. The fix starts the same way (remove the .maintenance file), but if deleting it doesn’t resolve the blank screen, you’ll need to work through the WordPress White Screen of Death fix guide instead.
- You’re seeing a 500 Internal Server Error — a failed plugin or theme update can corrupt files and cause a 500 error rather than the maintenance message. Again, start with the .maintenance file fix, but if the 500 error persists, read the 500 Internal Server Error fix guide.
- You intentionally put your site into maintenance mode using a plugin — a maintenance mode plugin (like SeedProd, WP Maintenance Mode, or Coming Soon Page) works differently from WordPress’s native maintenance mode. If you used a plugin to enable maintenance mode, the .maintenance file fix below won’t apply. Go to your WordPress dashboard, find the plugin, and toggle maintenance mode off from there. If you can’t access your dashboard, deactivate the plugin via FTP by renaming its folder in /wp-content/plugins/.
- You’re not seeing the message yourself but visitors are complaining — this is almost certainly a caching issue. Your browser has the live site cached while visitors are seeing a cached version of the maintenance page. Clear your caching plugin and CDN cache before doing anything else.
Common Signs Your WordPress Site Is Stuck in Maintenance Mode
- “Briefly unavailable for scheduled maintenance”
- Site stuck after plugin update
- Site stuck after theme update
- WordPress update frozen
- Visitors seeing maintenance page for hours
wp-admininaccessible after update
The Fix: Delete the .maintenance File
This single step resolves the WordPress maintenance mode problem in the vast majority of cases. It takes about two minutes.
Method 1: Using Your Hosting File Manager (Easiest — No FTP Client Needed)
This is the fastest method for most site owners and works directly in your hosting control panel without installing any additional software.
If you’re on Hostinger:
- Log into your Hostinger hPanel at hpanel.hostinger.com
- Go to Websites → Manage → File Manager
- You’ll land in the File Manager showing your site’s files
- Navigate to your WordPress root directory — this is usually /public_html/
- Important: enable hidden files so the .maintenance file is visible. In Hostinger’s File Manager, click the Settings icon or look for a “Show Hidden Files” toggle and enable it
- Look for a file named .maintenance — it has no extension, just a dot before the name
- Right-click it and select Delete
- Refresh your website in a new browser tab
Your site should be back online immediately.
If you’re on cPanel:
- Log into cPanel and open File Manager
- Navigate to your WordPress root directory (usually public_html)
- Click Settings in the top right of File Manager and check “Show Hidden Files (dotfiles)” — click Save
- Find the .maintenance file and click Delete
- Refresh your site
Method 2: Using FTP (FileZilla)
If you prefer FTP or your host doesn’t have a built-in File Manager:
- Open FileZilla (or your preferred FTP client) and connect to your site using your FTP credentials from your hosting panel
- Navigate to your WordPress root directory on the right-hand (remote site) panel — usually /public_html/
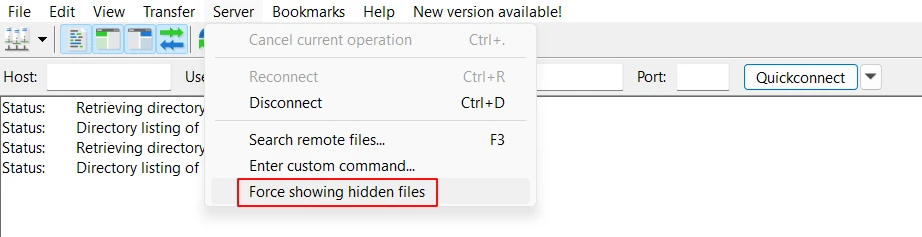
- Enable hidden files: go to Server → Force showing hidden files in FileZilla’s top menu. Without this, the .maintenance file won’t appear
- Look for the .maintenance file in the root directory
- Right-click it and select Delete
- Refresh your website
Can’t Find the .maintenance File?
If you’ve enabled hidden files and the .maintenance file still isn’t there, a few things may be happening:
- The file was already deleted but you’re seeing a cached maintenance page. This is common. Clear your browser cache (Ctrl+Shift+Delete), clear your caching plugin cache, and if you use Cloudflare, purge the cache there too. Try visiting your site in an incognito window — if it loads normally there, caching is the issue.
- Your hosting auto-cleaned it. Some managed WordPress hosts automatically clean up the .maintenance file after a timeout period. If this happened, your site should be accessible now — the cached maintenance page was just fooling you.
- The problem isn’t maintenance mode. If there’s no .maintenance file and your site still shows a maintenance-type message, the message may be coming from a maintenance mode plugin rather than WordPress core. Check your installed plugins.
After Deleting the File: What to Do Next
Deleting the .maintenance file gets your site back online, but there’s important cleanup to do.
Step 1: Clear All Caches
Even with the .maintenance file deleted, visitors (and you) may continue seeing the maintenance page if it’s cached. Clear caches in this order:
- Your browser cache — press Ctrl+Shift+Delete in Chrome or Firefox and clear cached images and files
- Your WordPress caching plugin — go to LiteSpeed Cache → Purge → Purge All, or WP Rocket → Clear Cache
- Your CDN cache — if you use Cloudflare, go to Caching → Purge Cache → Purge Everything
- Your hosting server cache — in Hostinger hPanel, go to WordPress → Cache → Clear Cache
Step 2: Check What Happened to the Update
This step is what most guides skip, and it matters. You deleted the .maintenance file — but what about the update that was interrupted? Did it partially complete? Did it fail entirely?
Log into your WordPress dashboard and go to Dashboard → Updates.
Look carefully at what’s listed there:
- If the update shows as completed — WordPress managed to finish the update before or after you deleted the file. You’re done. Just confirm your site is working normally.
- If the update shows as still pending — it didn’t complete. You need to run it again. Update that plugin, theme, or WordPress core again — this time one at a time, not in bulk.
- If you see a notice about a failed update — WordPress may show a “An automated WordPress update has failed to complete” notice at the top of the dashboard. Click the link in that notice to retry the update.
Don’t skip this step. Running a partial update and leaving it incomplete can cause plugin conflicts, missing features, or security vulnerabilities.
Step 3: Check Your Site Is Working Properly
After the update completes, do a quick site check:
- Visit your homepage — does it load normally?
- Check a few internal pages — do they load?
- Check your admin dashboard — does it function normally?
- Submit a test entry through your contact form if you have one
- Check any e-commerce functionality if you run a shop
If everything looks fine, you’re done. If something is broken, the interrupted update may have partially updated a plugin or theme in a way that created a conflict — move to the next section.
Site Still Broken After Deleting the .maintenance File?
If your site is back online but something isn’t working correctly — or if the maintenance mode message reappeared shortly after you deleted the file — work through these additional fixes.
The .maintenance File Keeps Reappearing
If you remove the temporary update flag (.maintenance file) and it reappears within seconds or minutes, a plugin is regenerating it. This happens when a plugin has its own update process running and keeps triggering WordPress’s maintenance mode.
The fix: disable all plugins via FTP before deleting the file.
- Connect via FTP or File Manager
- Navigate to /wp-content/
- Rename the plugins folder to plugins_disabled
- Now delete the .maintenance file from your root directory
- Refresh your site — it should load (with plugins deactivated)
- Log into your dashboard
- Rename plugins_disabled back to plugins
- Reactivate plugins one at a time, checking after each one for issues
A Plugin or Theme Broke After the Interrupted Update
A failed update can leave a plugin or theme in a partially updated state — some files updated, others not — which causes conflicts, blank sections, or PHP errors on your site.
- The quickest diagnostic: disable all plugins via FTP (rename the plugins folder as above) and switch to a default WordPress theme. If your site works normally with everything disabled, reactivate one plugin at a time until you find the broken one.
- For the broken plugin: delete it completely via FTP (navigate to its folder in /wp-content/plugins/ and delete the entire folder), then reinstall it fresh from the WordPress plugin repository. A fresh installation replaces any partially updated files.
WordPress Core Files Were Corrupted
If the interrupted update was a WordPress core update rather than a plugin or theme update, some core files may be partially updated or corrupted.
The fix is to reinstall WordPress core files — this replaces all core files with fresh copies without touching your content, themes, plugins, or settings.
- Download the latest version of WordPress from wordpress.org/download
- Extract the zip file on your local computer
- Delete wp-config.php from the extracted files — never overwrite your live wp-config.php
- Delete the wp-content folder from the extracted files — never overwrite your live wp-content
- Connect via FTP and upload the remaining extracted files to your WordPress root, overwriting existing files
- Refresh your site
File Permissions Prevented the .maintenance File from Being Deleted
In rare cases, file permission settings on the server prevent WordPress from deleting the .maintenance file automatically — and may also prevent you from deleting it manually.
If you’re getting a permission error when trying to delete the file, contact your hosting provider and ask them to:
- Check the file ownership of the .maintenance file
- Reset file permissions on the WordPress root directory
- Delete the .maintenance file on your behalf if needed
This is a server-level issue that requires hosting provider access to resolve properly.
How to Prevent WordPress Getting Stuck in Maintenance Mode
The fix is simple, but getting stuck in maintenance mode is disruptive — especially if your site is business-critical and you don’t notice for hours. These habits significantly reduce the chances of it happening again.
- Update plugins and themes one at a time – The most common trigger for a stuck maintenance mode is bulk-updating everything at once. When you update 10 plugins simultaneously, the server has to process all 10 update sequences in parallel — a much heavier load than updating one at a time. If the server times out or runs out of memory under that load, maintenance mode gets stuck. Update one, check your site, update the next.
- Update during low-traffic periods – Running updates when your site has minimal visitors reduces the chance of a server resource spike during the update process. For most small business sites, late evening or early morning works well.
- Check plugin and theme compatibility before updating – Before running a major update — particularly WordPress core version updates — check the plugin developer’s changelog or support forum to confirm the new version is compatible with your current setup. Most update-related maintenance mode issues come from incompatible plugin updates.
- Keep PHP and server resources adequate – Maintenance mode gets stuck when an update times out — and updates time out when the server is slow or under-resourced. Running on a quality hosting plan with a modern PHP version (8.2 or higher) and sufficient memory reduces timeout frequency significantly.
- Set up automated backups – A stuck maintenance mode is usually recoverable in minutes — but if the interrupted update caused database corruption or file damage, having a recent backup is essential. Use UpdraftPlus or your hosting provider’s backup system to schedule daily automatic backups stored off-site.
- Monitor your site with uptime alerts – If your site goes into maintenance mode at 2am and you don’t notice until your morning coffee, you’ve been offline for hours. A basic uptime monitor pings your site every few minutes and alerts you immediately when it goes down. Many hosting providers include this, and free tools like UptimeRobot work well too.
WordPress Stuck in Maintenance Mode: Quick Reference
| Situation | Fix |
|---|---|
| Seeing “Briefly unavailable for scheduled maintenance” | Delete .maintenance file from WordPress root via File Manager or FTP |
| Can’t find the .maintenance file | Enable “Show hidden files” in File Manager or FTP client |
| Deleted the file but still seeing maintenance page | Clear browser cache, caching plugin cache, CDN cache, and hosting cache |
| .maintenance file keeps reappearing | Disable all plugins via FTP first, then delete the file |
| Site back online but something is broken | Disable plugins one by one to find the broken one, reinstall it fresh |
| WordPress core update was interrupted | Reinstall WordPress core files via FTP |
| Permission error when deleting .maintenance file | Contact hosting provider to reset file permissions |
| Maintenance mode enabled by a plugin, not WordPress | Disable the maintenance mode plugin from WordPress dashboard or via FTP |
Frequently Asked Questions
How long should WordPress stay in maintenance mode?
Normally 30-60 seconds at most — just long enough for the update to complete and the .maintenance file to be automatically deleted. If it’s been more than a couple of minutes, the update was interrupted and you’ll need to delete the file manually. There’s no situation where legitimate WordPress maintenance mode should last longer than a few minutes without intervention.
Is it safe to delete the .maintenance file?
Yes, completely safe. The .maintenance file is a temporary flag file created solely for the purpose of triggering the maintenance message. Deleting it has no effect on your WordPress database, your content, your plugins, or your settings. WordPress will create a new one automatically the next time an update runs. The only consideration is whether the underlying update that created it completed successfully — which is why you should check your Dashboard → Updates page after deleting the file.
Can I prevent WordPress from going into maintenance mode during updates?
You can’t disable WordPress’s native maintenance mode during updates — it’s a core protective feature that prevents visitors from seeing a broken site mid-update. What you can control is the risk of it getting stuck: update one plugin at a time, maintain adequate server resources, and use reliable hosting. Some managed WordPress hosts handle updates differently and have their own mechanisms for reducing maintenance mode issues.
My site went into maintenance mode and I didn’t run any updates — why?
WordPress can be configured to run automatic background updates. If you have automatic updates enabled — either for WordPress core, plugins, or themes — WordPress may have triggered an update automatically, and if that update was interrupted, you’d wake up to a maintenance mode screen with no memory of starting an update. Check your WordPress settings under Dashboard → Updates to see your auto-update configuration, and check your update history to see what was attempted.
How do I fix WordPress maintenance mode without FTP access?
Your hosting control panel’s File Manager provides the same functionality as FTP for this fix — you can find and remove the hidden WordPress .maintenance file through File Manager without needing a separate FTP client. Hostinger’s hPanel, cPanel, and Plesk all include File Manager. If you genuinely have access to neither FTP nor File Manager, contact your hosting provider’s support team — they can delete the file on your behalf in minutes.
Will my site lose data because of the interrupted update?
In almost all cases, no. WordPress updates primarily replace PHP files — no content, settings, or database data is lost in a failed update. The risk from an interrupted update is a plugin or theme being left in a partially updated state, which can cause compatibility issues or missing functionality. Re-running the update or reinstalling the affected plugin fresh from the repository resolves this without any data loss.
Back Online in Minutes — That’s All It Takes
The WordPress maintenance mode error looks serious when it hits — your entire site replaced by a single message, visitors unable to access anything. But it’s genuinely one of the most straightforward fixes in WordPress troubleshooting. One hidden file, two minutes, site restored.
Delete the .maintenance file. Clear your caches. Check that the interrupted update completed or re-run it. And going forward, update one plugin at a time rather than all at once — that single habit prevents the majority of maintenance mode issues before they start.
If you’ve deleted the file, cleared the caches, and your site is still showing problems, work through the additional fixes above systematically. The answer is always in the files or the failed update — it just needs to be found.
Part of the Common WordPress Errors and How to Fix Them troubleshooting series.
Related reading: How to Fix the WordPress White Screen of Death | WordPress Site Is Hacked — What to Do First