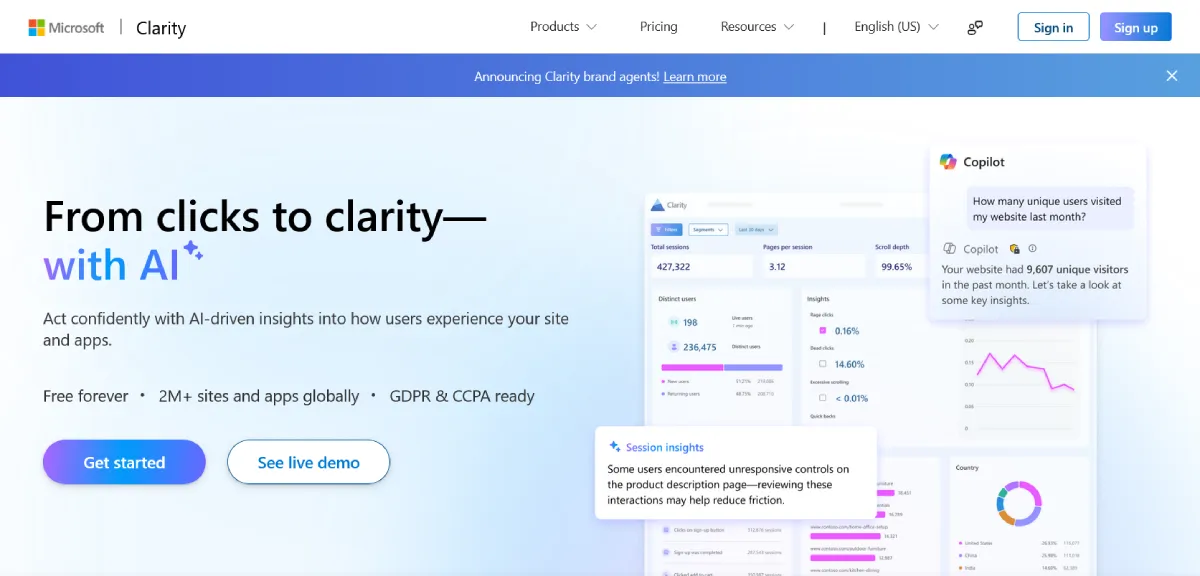
I’ve been using Google Analytics on my WordPress site for a while now, and it’s great for tracking traffic numbers. But one thing it never showed me was why visitors were leaving certain pages, or which parts of my content they were actually reading. That’s exactly the gap Microsoft Clarity fills — and the best part is, it’s completely free.
In this guide, I’ll walk you through how to install Microsoft Clarity on WordPress using the official Clarity plugin, step by step. I’ll also show you how to actually read your data and use it to make smarter SEO decisions. No coding required.
Quick Summary
Microsoft Clarity helps you:
- See where users click (heatmaps)
- Watch session recordings
- Identify UX issues like rage clicks
- Improve SEO through better user experience
What Is Microsoft Clarity?
Microsoft Clarity is a free behavior analytics tool that helps you see how real visitors interact with your website. While Google Analytics tells you how many people visited a page, Clarity shows you what they did on that page — where they clicked, how far they scrolled, and where they gave up and left.
It does this through three main features:
- Heatmaps — A color-coded visual map of your page showing exactly where visitors clicked, scrolled, and spent the most time. Hot spots (red/orange) mean high engagement. Cool spots (blue) mean that area is being ignored.
- Session recordings — Anonymous replays of real visitor sessions on your site. You can literally watch how someone moved their mouse, where they got stuck, and what they did before leaving.
- Insights dashboard — A summary of behavioral metrics like rage clicks (when someone clicks the same spot repeatedly out of frustration), dead clicks (clicks that go nowhere), and scroll depth.
Clarity is 100% free, has no traffic limits, and works on any WordPress site — including WooCommerce stores.
Why Use Clarity on WordPress?
Here’s why Clarity is a great addition to your website:
- 100% free with no traffic limits
- No coding required (plugin-based setup)
- Helps identify UX issues affecting conversions
- Works alongside tools like Google Analytics
If you’re working on improving traffic, engagement, or conversions, this tool gives you real insights — not just numbers.
Is Microsoft Clarity Good for SEO?
This is a question I get a lot. The short answer is: Clarity doesn’t directly improve your rankings, but it gives you the data to make changes that do.
Here’s how it connects to SEO in a practical way:
If your heatmap shows that visitors are not scrolling past the first two paragraphs of a blog post, your introduction needs work. If your session recordings show people clicking on something that isn’t a link, you’re missing a content opportunity. If your bounce rate in GA4 is high, Clarity’s recordings can show you exactly why people are leaving — something GA4’s numbers alone can never tell you.
In short: Google Analytics tells you the score of the match. Microsoft Clarity shows you the actual game footage. You need both to get the full picture.
Microsoft Clarity vs. Google Analytics — Which One Do You Need?
You don’t have to choose between them — they’re designed to work together. Here’s a quick breakdown of what each one does best:
- Google Analytics is best for traffic data, source/medium tracking, conversions, and understanding where your visitors come from.
- Microsoft Clarity is best for understanding what visitors do once they land on your site — behavioral data like clicks, scrolls, and frustration signals.
I recommend using both on your WordPress site. They even integrate with each other, which I’ll cover later in this post.
| Feature | Clarity | Google Analytics |
|---|---|---|
| User behavior visualization | ✅ | ❌ |
| Traffic data | ❌ | ✅ |
| Heatmaps | ✅ | ❌ |
| Session recordings | ✅ | ❌ |
Best approach: Use both together for complete insights.
How to Install Microsoft Clarity on WordPress Using the Clarity Plugin
There are a few ways to add Clarity to WordPress — manually through code, via Google Tag Manager, or using a plugin. For beginners, the official Microsoft Clarity plugin is by far the easiest option. Here’s exactly how to do it.
Prerequisites
Before you begin, make sure you have:
- A WordPress website
- Access to your WordPress dashboard
- A free Clarity account (you can create it during setup)
Step 1: Create a Free Microsoft Clarity Account
Before installing anything on WordPress, you need to set up your Clarity account first.
Go to clarity.microsoft.com and click Get Started. You can sign up using your Microsoft account, Google account, or Facebook account. I use my Google account since it makes the GA4 integration simpler later.
Once you’re signed in, click Add new project. Enter your website name and your site’s full URL (including https://). Then click Add project.
You’ll be taken to a setup screen that asks how you want to install the tracking code. You can skip past this for now because we’re going to use the WordPress plugin to handle it automatically.
Before you leave this screen, take note of your Project ID. It’s a short string of characters that appears at the end of the tracking code snippet — something like ejbjp9k5ge. You’ll need this in the next steps.
Step 2: Install the Microsoft Clarity Plugin on WordPress
Now log in to your WordPress admin dashboard.
From the left-hand menu, go to Plugins → Add New Plugin.
In the search bar, type Microsoft Clarity. The official plugin by Microsoft will appear at the top of the results.
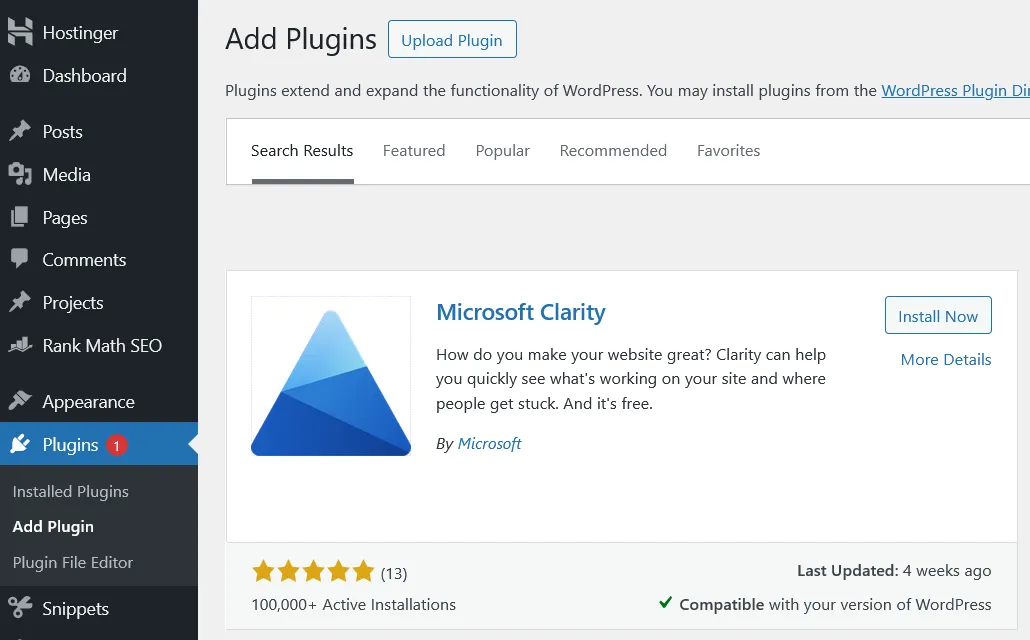
Click Install Now, and once it finishes, click Activate.
Step 3: Connect the Plugin to Your Clarity Account
After activation, you’ll see a new Clarity option in your WordPress left-hand menu. Click on it.
You’ll be prompted to Sign In. Click that button and sign in using the same account you used when creating your Clarity project (Google, Microsoft, or Facebook).
Once signed in, Clarity will either automatically detect your existing project or show you a dropdown to choose from your projects. Select the project you just created and click Continue.
That’s it — your WordPress site is now connected to Microsoft Clarity. The plugin automatically adds the tracking code to every page of your site. No manual code editing needed.
Step 4: Clear Your WordPress Cache
This is a step most tutorials skip, but it’s important. If you’re using a caching plugin like WP Rocket, W3 Total Cache, or LiteSpeed Cache, you need to clear your cache immediately after connecting Clarity. If you don’t, Clarity might not be able to start recording sessions right away because your visitors are still seeing cached pages without the tracking code.
Go to your caching plugin and hit Clear All Cache. This takes just a few seconds.
Step 5: Verify That Clarity Is Working
Give it a few minutes and then visit your Clarity dashboard at clarity.microsoft.com. You should start seeing live user data appear within a few hours. It can sometimes take up to 24–48 hours before you see a significant amount of session recordings and heatmap data, especially on newer websites with lower traffic.
To confirm the tracking code is actually running, you can right-click anywhere on your live website and select Inspect. In the browser developer tools, click on the Network tab and interact with your page. Look for outgoing POST requests to clarity.ms/collect. If you see those requests, Clarity is working correctly.
How to View Your Clarity Dashboard Inside WordPress
One of the things I really like about the updated Clarity plugin is that you don’t have to keep switching between your WordPress dashboard and the Clarity website. You can view your heatmaps, session recordings, and insights directly from inside WordPress.
From your WordPress admin panel, just click on the Clarity menu item in the left sidebar. You’ll see your embedded dashboard with tabs for Dashboard, Recordings, Heatmaps, and Insights.
Understanding Your Microsoft Clarity Data (For Beginners)
Installing the plugin is the easy part. The real value comes from knowing how to read and act on your data. Let me break down what to look at first.
Heatmaps — What to Look For
Open the Heatmaps tab and select any page on your site. Clarity gives you three types of heatmaps:
Click heatmap — Shows exactly where visitors are clicking. If you see a lot of clicks on something that isn’t a link or button, that’s a strong signal you should make it clickable — or at least address what visitors expect to find there.
Scroll heatmap — Shows how far down the page visitors are scrolling. If most of your visitors are dropping off before reaching your main conclusion or call to action, you know your content needs to be restructured to front-load the most important information.
Area heatmap — Shows which sections or links attract the most attention within a specific region of your page.
For SEO purposes, the scroll heatmap is especially valuable. If visitors aren’t reading your full article, it tells you your content structure, headings, or formatting needs work — which directly impacts time-on-page and engagement signals.
Session Recordings — What to Watch For
In the Recordings tab, you can filter sessions by things like device type, pages visited, or session duration. I recommend starting with sessions that show a rage click or dead click label, because those are clear frustration signals.
Rage clicks happen when a visitor clicks the same spot rapidly — usually because something isn’t working the way they expect. This could be a broken link, a slow-loading element, or a button that doesn’t respond.
Dead clicks happen when a visitor clicks on something that isn’t interactive at all. This often means visitors think something is a link when it isn’t — a very common issue with underlined text or bolded phrases.
Fixing these issues improves user experience, which in turn helps your SEO performance.
The Insights Tab — Your Quick Overview
The Insights tab shows you a summary of how your site is performing in terms of user behavior. You can see your most visited pages, the percentage of sessions with rage clicks, scroll depth across your site, and traffic by device type.
I recommend checking this tab at least once a week when you’re in a growth phase. It helps you quickly spot pages that need attention.
How to Connect Microsoft Clarity With Google Analytics
This is one of my favorite features of Clarity — the Google Analytics integration. When you link the two, you can open a specific session recording in Clarity directly from your GA4 reports. It makes it much easier to understand why a particular segment of traffic is behaving differently.
To set this up, log in to your Clarity account and go to Settings → Google Analytics. Select your GA4 property from the dropdown and authorize the connection. Once linked, you’ll start seeing a Clarity link appear within your GA4 session data.
This works especially well if you’ve been tracking direct traffic issues in GA4 — you can use Clarity recordings to see exactly what those sessions looked like in practice.
Important: Clarity and GDPR Compliance
If you have visitors from Europe (EU, UK, or Switzerland), there’s something important you need to know. From October 31, 2025, Microsoft Clarity requires valid consent signals for visitors from those regions. Without a cookie consent setup, Clarity will run in a limited mode for European visitors — meaning you’ll miss out on heatmaps and session recordings for that audience.
The easiest fix is to use a cookie consent plugin like WPConsent or CookieYes. These plugins display a cookie consent banner to your visitors and send the appropriate consent signals to Clarity automatically. This keeps your site GDPR-compliant and ensures you don’t lose behavioral data.
Even if most of your traffic isn’t from Europe right now, it’s a good habit to set up consent management early — especially if you’re focused on growing your site’s reach.
How to Use Clarity Data to Actually Improve Your SEO
Let me give you a few practical, actionable ways I use Clarity data to improve content performance.
Improve your blog post introductions — If the scroll heatmap on a blog post shows most visitors leaving within the first 20% of the page, rewrite your intro. Make it more direct, add a clear statement of what the reader will learn, and get to the value faster.
Optimize your internal links — Check your click heatmaps to see which internal links visitors are actually clicking. If your most important internal links are being ignored, try moving them higher on the page or making the anchor text more descriptive and action-oriented.
Fix broken or dead elements — Use the rage click and dead click filters in Recordings to find and fix elements that are confusing or frustrating visitors. Every rage click is a user experience problem you can solve.
Improve mobile experience — Filter heatmaps and recordings by mobile device. Mobile visitors often behave very differently from desktop visitors, and Clarity makes it easy to spot mobile-specific layout problems that might be hurting your bounce rate.
Identify your best-performing pages — Use the Insights dashboard to find which pages have the highest scroll depth and engagement. These are your strongest pages. Study what you did differently on those pages and replicate that structure across the rest of your site.
Install It Today, Improve Tomorrow
Installing Microsoft Clarity on WordPress takes less than five minutes, and the data it shows you will change how you look at your content — especially when you’re trying to figure out why a page isn’t converting or why your bounce rate is high. It’s one of the few free tools that gives you real visual data about what your visitors are actually doing on your site.
My recommendation: install it today, let it collect data for a week or two, and then sit down with your heatmaps and recordings. You’ll almost certainly spot things on your site that you never would have caught from looking at numbers alone.
If you haven’t set up Google Analytics yet, I’d do that alongside Clarity so you have full coverage of both your traffic and behavioral data. And if you’ve been seeing unexpected traffic patterns in GA4, Clarity’s session recordings are usually the fastest way to find out why.
Frequently Asked Questions About Microsoft Clarity on WordPress
Is Microsoft Clarity really free?
Yes, completely. There are no paid tiers, no traffic limits, and no data caps. You can track unlimited sessions on any size website at no cost.
Will Microsoft Clarity slow down my WordPress site?
No. Clarity is built to be lightweight and loads asynchronously, meaning it doesn’t block your pages from loading. It will not negatively impact your Core Web Vitals or page speed scores.
Does Clarity collect personal data?
By default, Clarity automatically masks sensitive information like form fields, passwords, and personal text before it’s recorded or uploaded to Microsoft’s servers. This means real user data like names and email addresses are never captured.
How long does it take to see data in Microsoft Clarity?
You’ll typically start seeing live user counts within minutes of installing the tracking code. Full session recordings and heatmap data usually become available within 2–24 hours, depending on how much traffic your site receives.
Can I use Microsoft Clarity with WooCommerce?
Yes. The official Microsoft Clarity plugin works on both standard WordPress sites and WooCommerce stores. The same installation steps above apply.
Do I need Google Analytics if I have Microsoft Clarity?
I recommend using both. GA4 gives you traffic, source, and conversion data. Clarity gives you the behavioral context behind those numbers. Together, you’ll have both the numbers and the behavior behind them — which is when things start to make sense.